Troubleshooting LiteTouch: A Diagnostic Guide for CCU, Keypad, and Module Failures
If you’re standing in front of a LiteTouch panel with a light that won’t respond, this guide walks the actual diagnostic path — not a parts list, not a sales pitch. Just what to check, in what order, and what each result tells you.
For background on why this system exists in this state at all, see what happened to LiteTouch and how LiteTouch actually works. This post assumes you already have a fault in front of you and need to know what it means.
Before You Touch Anything: What You’re Looking At
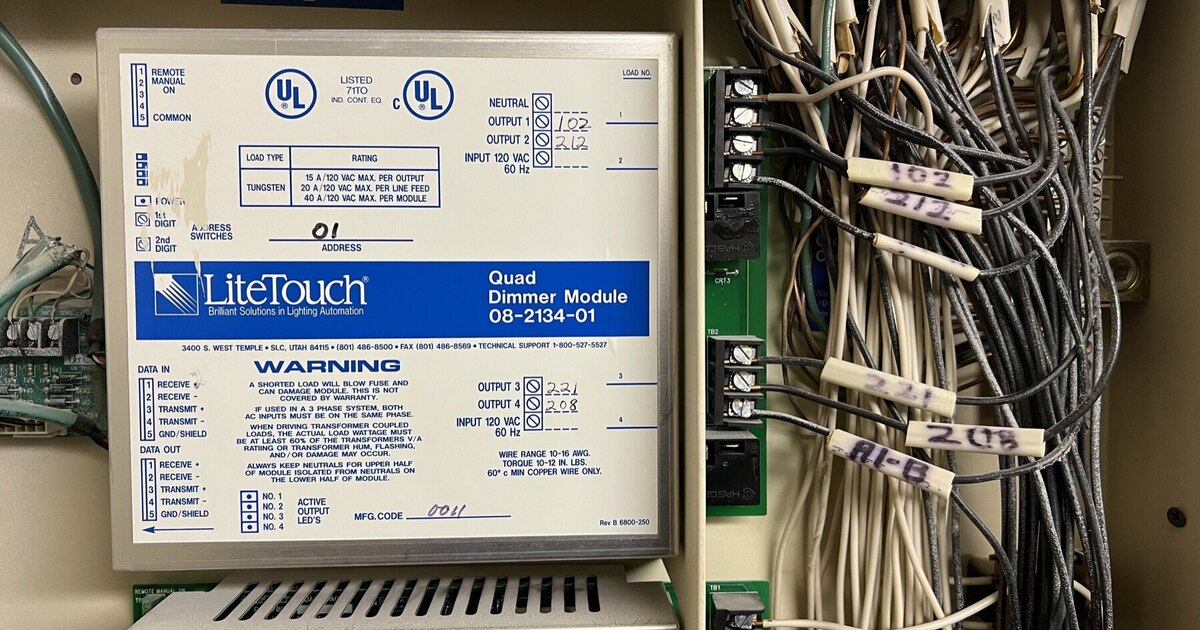
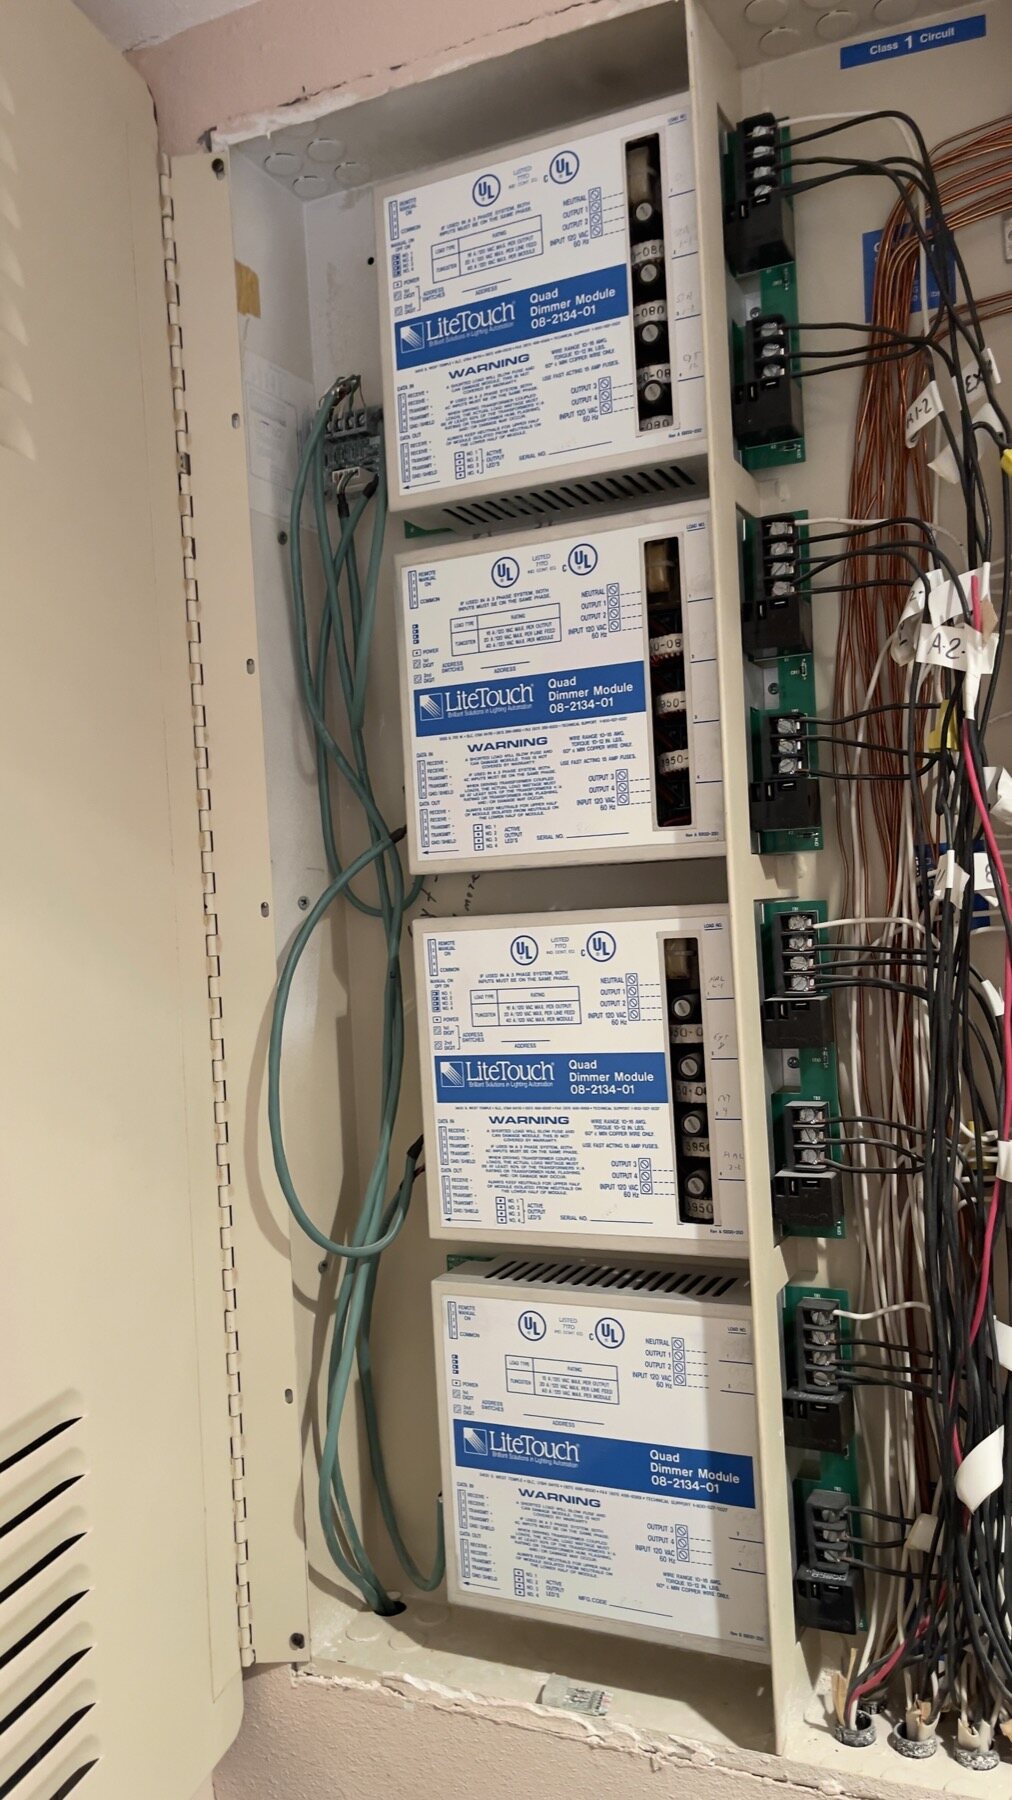
LiteTouch is a panelized, hardwired lighting control system. Every keypad in the house — the 1-to-9-button stations on the wall — sends a signal back to a Central Control Unit (CCU), which is the brain of the system. The CCU interprets that signal against a program written years or decades ago in LiteWare software, then tells the correct dimmer or relay module to turn a load on, off, or to a set level. The modules themselves live in an enclosure, usually near the electrical panel, and each one physically switches the 120V circuit running to your fixtures.
That architecture matters for troubleshooting because it means a “light that won’t turn on” has exactly three possible failure points: the keypad that sent the signal, the CCU that interpreted it, or the module that was supposed to act on it. Everything below is about figuring out which of the three it is, without guessing.
One more thing before you start: LiteTouch enclosures put low-voltage control wiring and line-voltage dimmer/relay circuits in close proximity, sometimes in the same box. Observing a status light or an external DIP switch is safe. Opening a module, swapping a fuse, or handling wiring inside the enclosure is not a homeowner task — treat that boundary as fixed, not optional, for the rest of this guide.
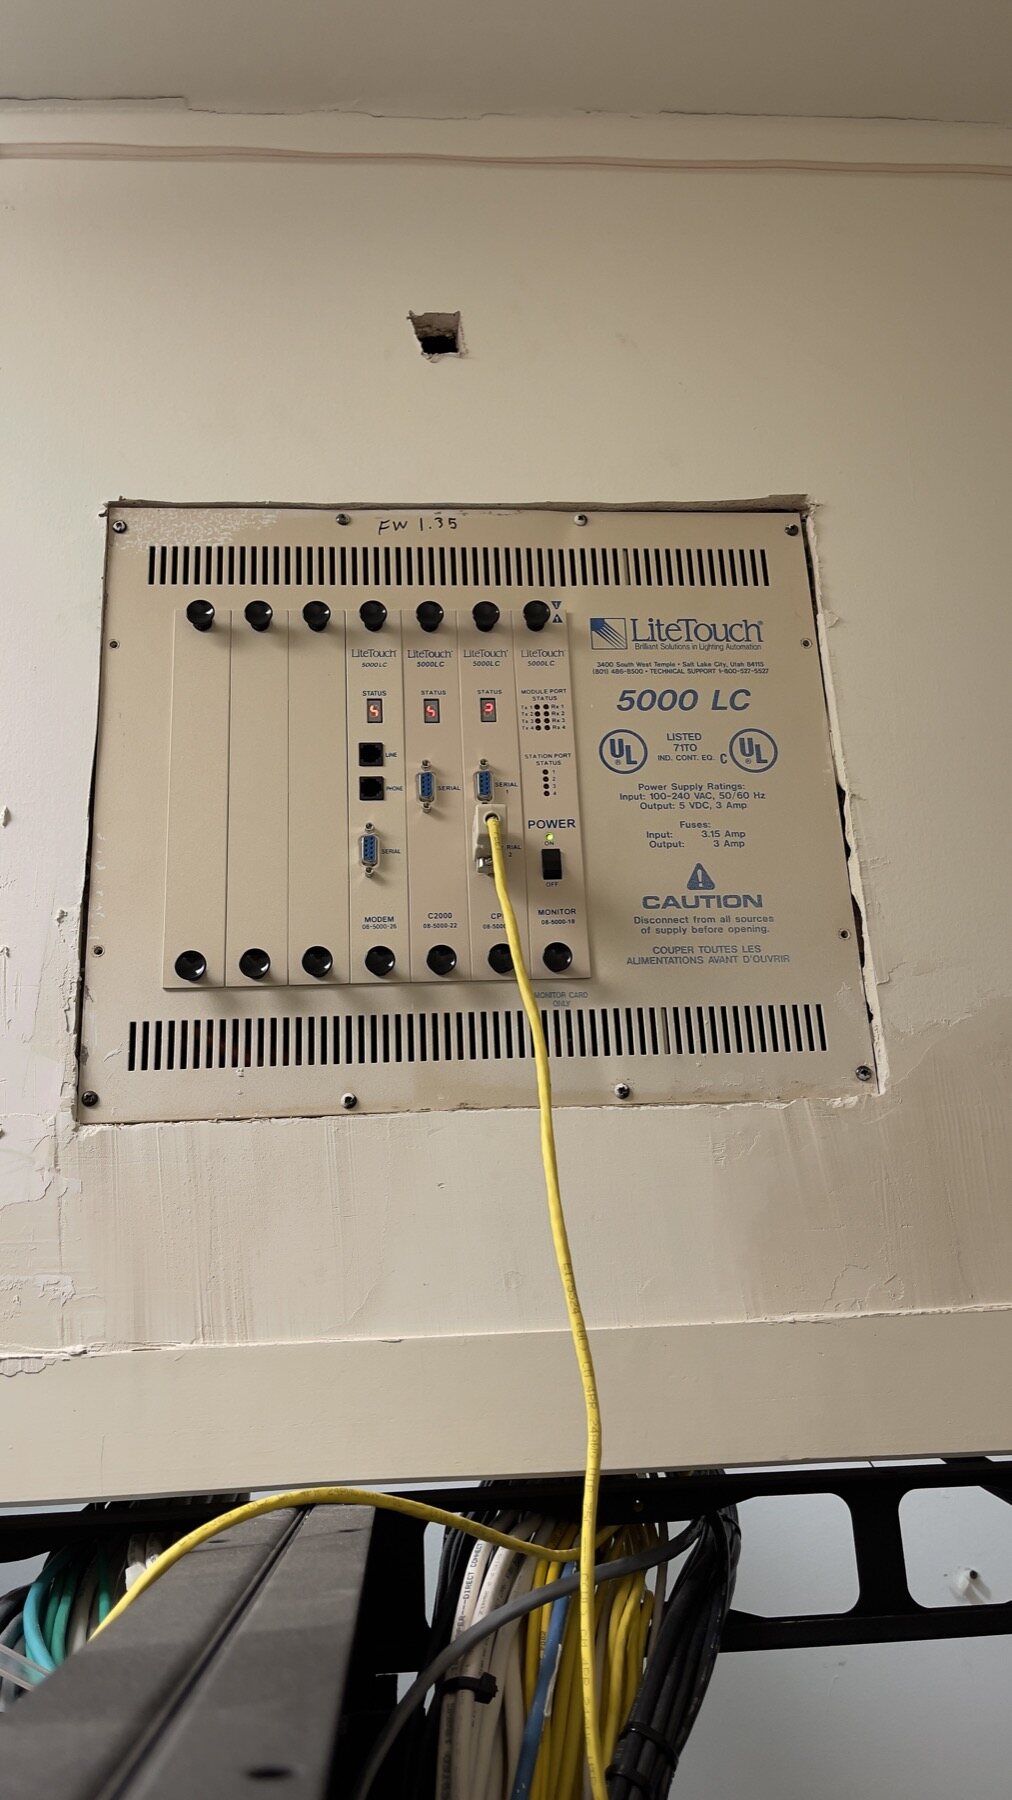
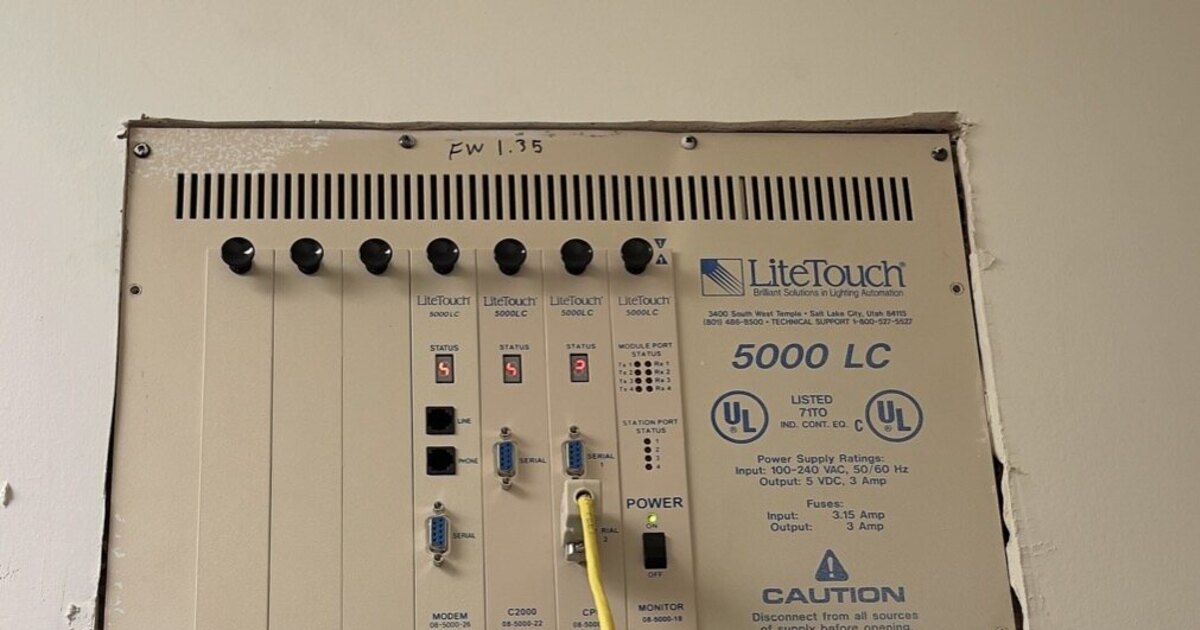
A 5000 LC CCU in the field, firmware 1.35 noted on the cover. The small red displays beside each card are the status indicators referenced throughout this guide — that is where a solid 8 appears.
Symptom 1: The Whole System Is Unresponsive
What you’ll see: No keypad in the house does anything. Every zone is stuck wherever it happened to be when the fault occurred.
Check the CCU status indicator first. If it’s showing a solid “8,” the CPU card — or the entire CCU — has locked up. This is a processing halt, not a wiring fault, and it’s the single most common cause of a whole-house outage on an aging LiteTouch system.
What to do: Find the CPU card’s reset button — it sits on the component-populated face of the card — and press it. This forces the CPU to reboot and reload its program, the same way power-cycling any embedded computer clears a hung process. In many cases, this alone restores full function within seconds.
What the result tells you:
- If the reset clears the fault and the system stays stable for days or weeks, treat it as an isolated event. Aging electrolytic capacitors and thermal stress on a 10-to-40-year-old CPU card can produce one-off lockups that don’t recur for a long time.
- If the reset clears it but the “8” comes back within hours or after a handful of days, the CPU card itself is degrading. A reset is a workaround at that point, not a fix, and the interval between lockups will generally shorten over time.
- If the reset does nothing at all — the display stays on “8” or goes dark — the CCU has failed at a deeper level. This is where a LiteTouch system typically reaches the end of what field troubleshooting can resolve, because CPU cards are not a part anyone manufactures anymore.
When to stop: A CCU that won’t clear on reset, or one that locks up on a tightening cycle, is a system nearing end of life. There is no card exchange program for this part. This is a legitimate point to start planning a replacement rather than continuing to chase resets.
Symptom 2: One Zone or One Room Is Dead, Everything Else Works
This is the most common LiteTouch complaint, and it’s also the most diagnosable — because a single dead zone with the rest of the house working rules out the CCU almost entirely. The fault lives in that zone’s keypad, its module, or the wiring between them.
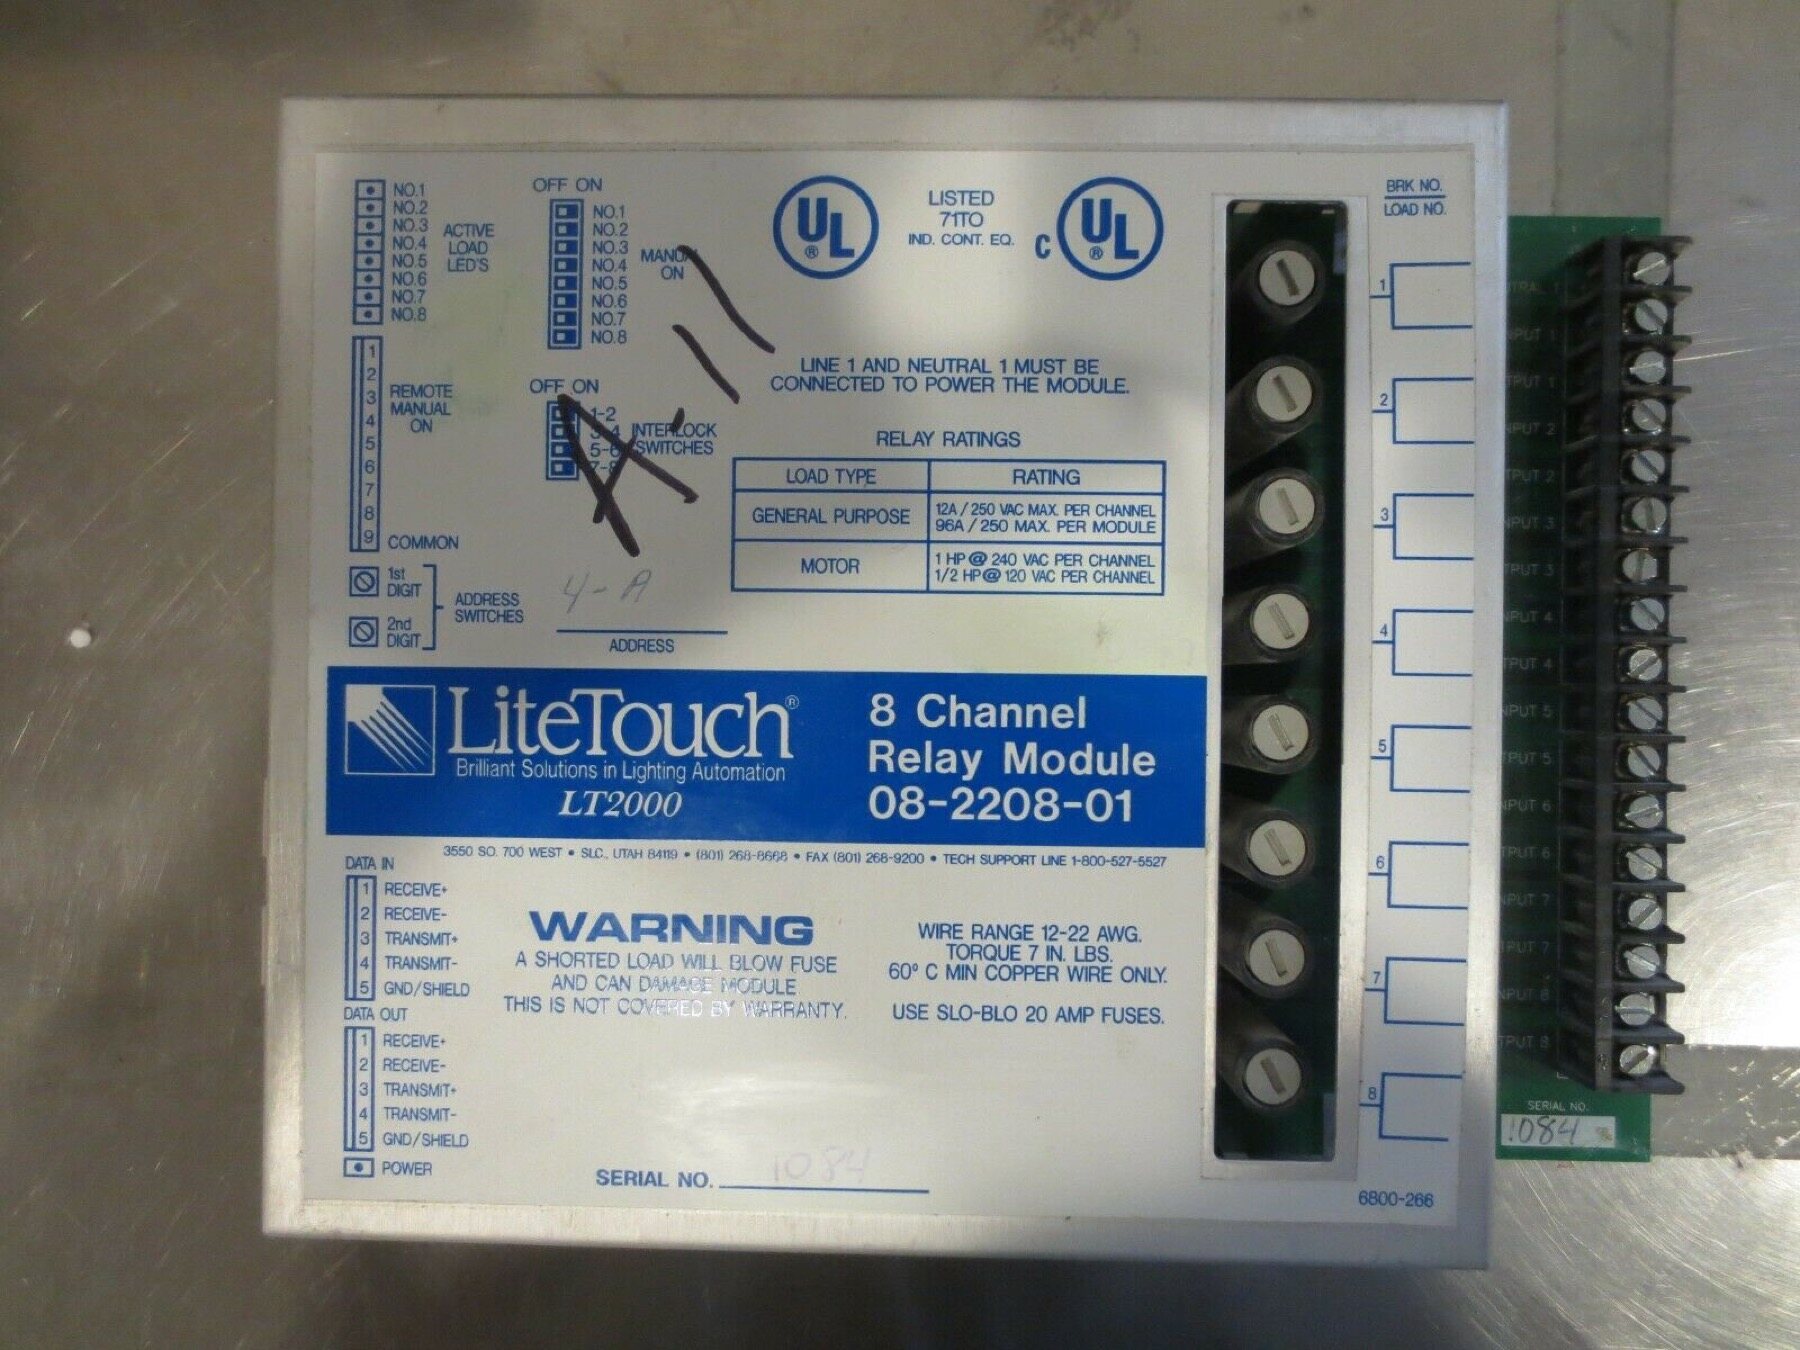
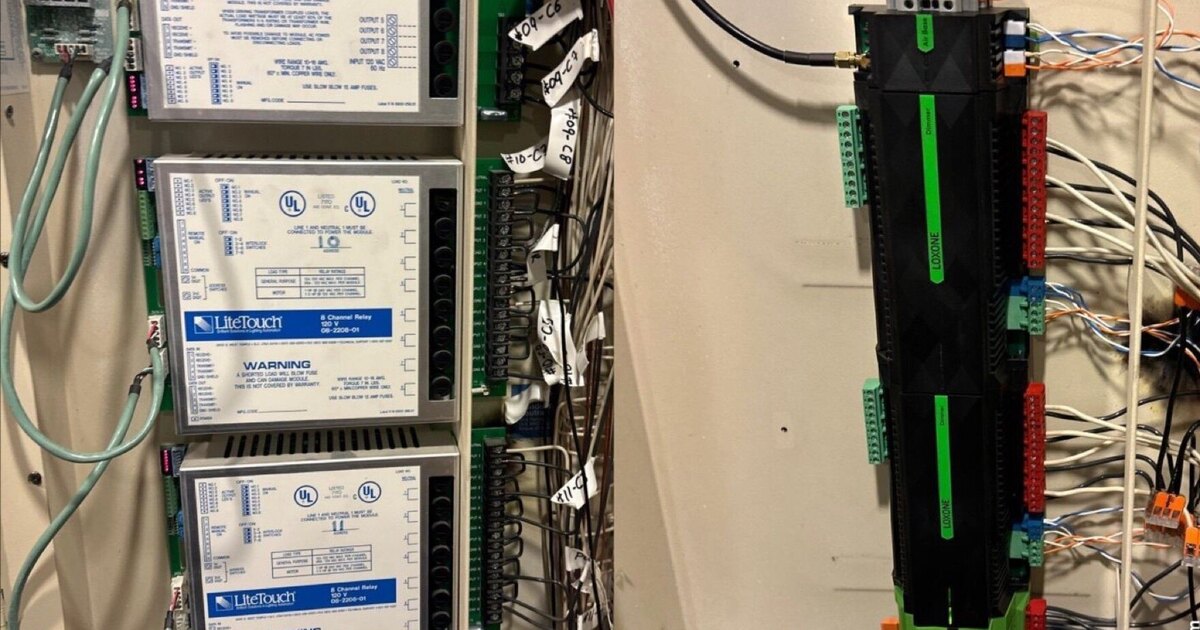
An 8 Channel Relay Module (08-2208-01) out of the panel. The switch banks on the left are the address and interlock switches — toggling these is how you separate a module fault from a keypad or programming fault.
Step 1: Locate the module for that zone and find its DIP switch
Dimmer and relay modules in the enclosure carry a bank of DIP switches that let you operate the connected load manually, completely bypassing the keypad and the CCU’s programming. This is the fastest and most reliable isolation test available on the whole system, and it takes seconds to run.
Step 2: Toggle it and read the result
If the light responds to the DIP switch — turns on, off, or dims as expected — the module is functioning and its fuse is intact. The fault is upstream: either the keypad that’s supposed to send the command, the wiring between the keypad and the CCU, or the program itself has been corrupted or lost for that button. Keypad wiring on most LiteTouch installs is 3-conductor, and it’s common to find it run untwisted and unshielded — a setup that’s tolerant of interference for years and then starts producing intermittent dropouts as connections oxidize or nearby wiring changes. An intermittent keypad fault often looks exactly like “sometimes works, sometimes doesn’t,” which is a strong hint to check the keypad and its run before assuming the module is at fault.
If nothing happens when you toggle the DIP switch — the fault is in the module or its fuse, not the keypad. Move to Step 3.
Step 3: Swap the fuse
Each module typically protects its load with a small fuse. Swap in a fuse of the same rating and try the DIP switch again.
If the DIP switch now works, the original fuse had blown — usually from a shorted load downstream (a failing ballast, a fixture with a wiring fault, or a bulb that shorted on its way out) rather than the module itself. Worth checking the fixture before calling it resolved, since whatever blew the fuse the first time can do it again.
If the DIP switch still does nothing with a known-good fuse, the module’s dimmer or relay circuit has failed internally. This is a hardware failure inside a part that hasn’t been manufactured since 2015. Secondary-market units exist but carry no warranty and unknown remaining life.
Symptom 3: A Keypad Looks or Feels Dead, But Other Zones from the Same Keypad Work
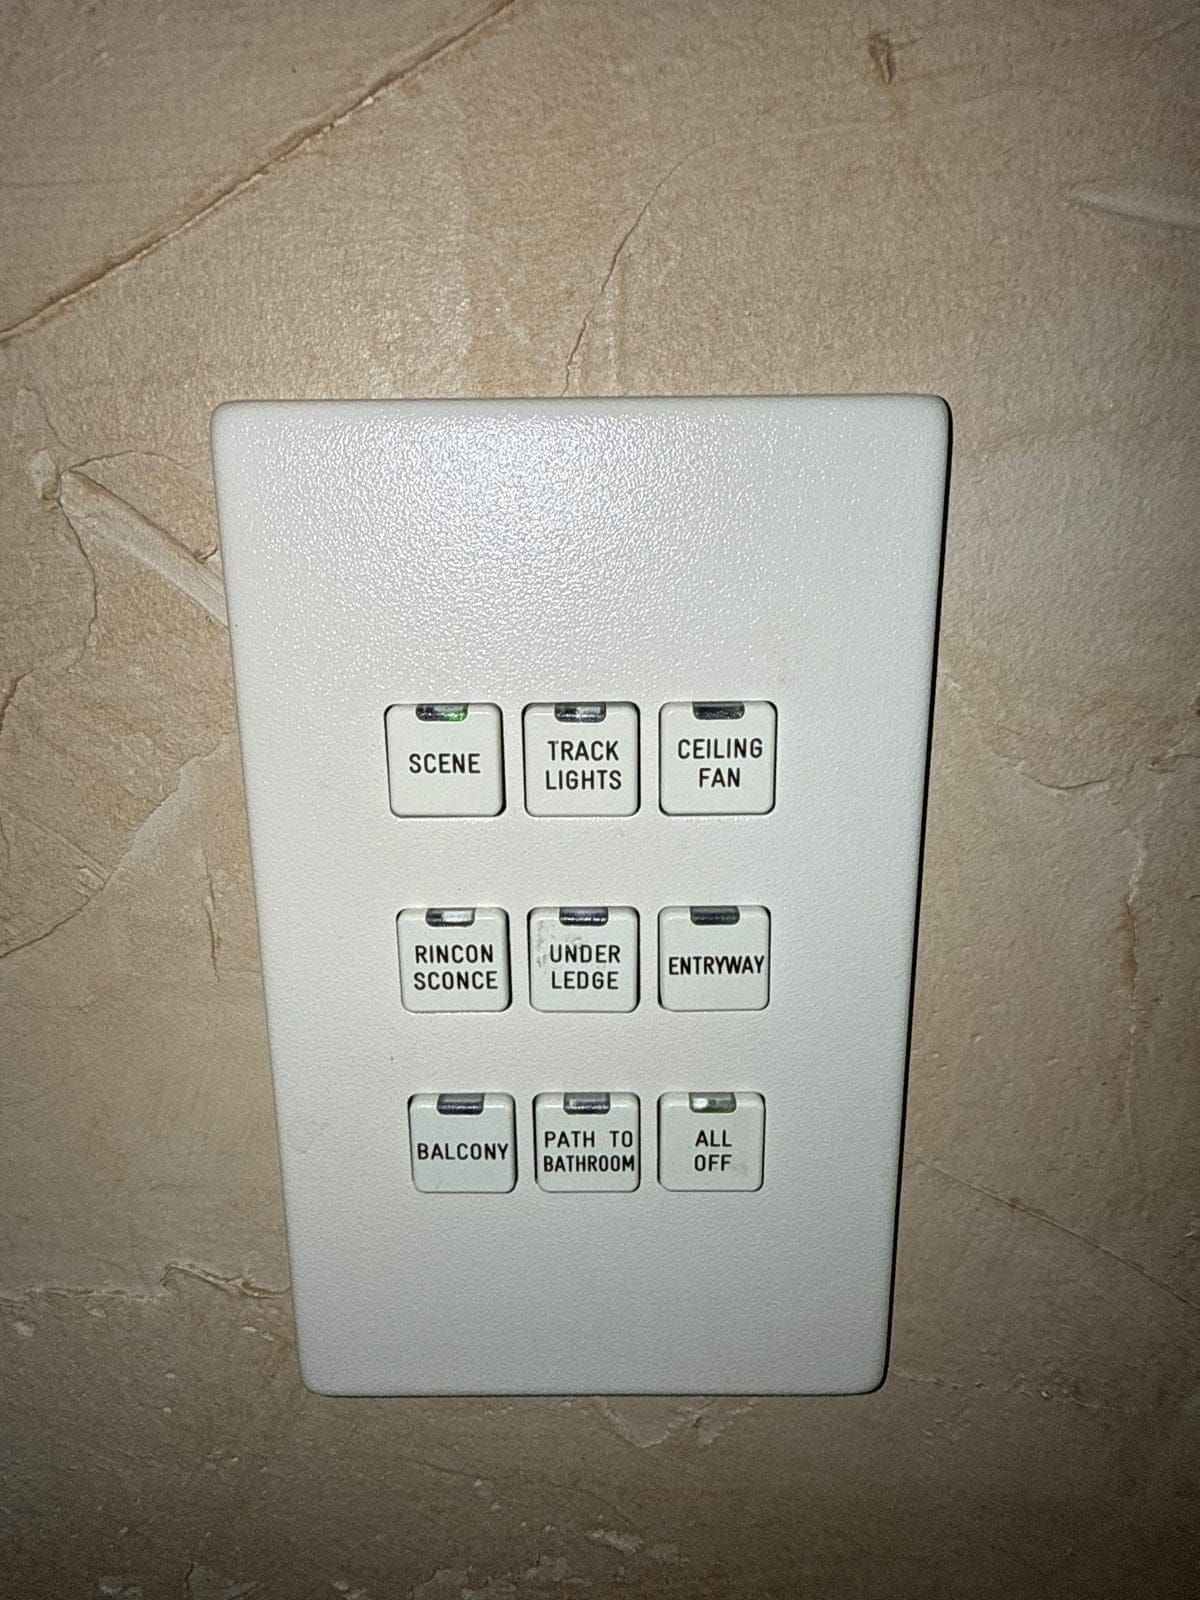
Sometimes it’s not the whole keypad — it’s the backlighting, or one specific button.
Dead backlighting with buttons that still function is one of the most common LiteTouch failure modes simply from age. LED and incandescent backlight sources in original keypads have been running for years on continuous or near-continuous duty cycles. A dark keypad that still triggers scenes when pressed in a dark room is a cosmetic and usability issue, not a functional failure — annoying, but low priority.
One unresponsive button on an otherwise working keypad usually points to a worn switch contact or a failed solder joint on that specific button’s circuit, rather than anything upstream. It’s a keypad-level repair or replacement, not a CCU or module issue, and it doesn’t necessarily mean the rest of the keypad is at risk — though on a keypad this old, it’s a fair signal that others may follow.
A keypad that’s completely dark and completely unresponsive points to a power or wiring problem at that keypad specifically — worth checking before assuming the module has failed, especially if the DIP switch test in the previous section showed the module itself is fine.
Symptom 4: Intermittent, Comes-and-Goes Faults Across Multiple Zones
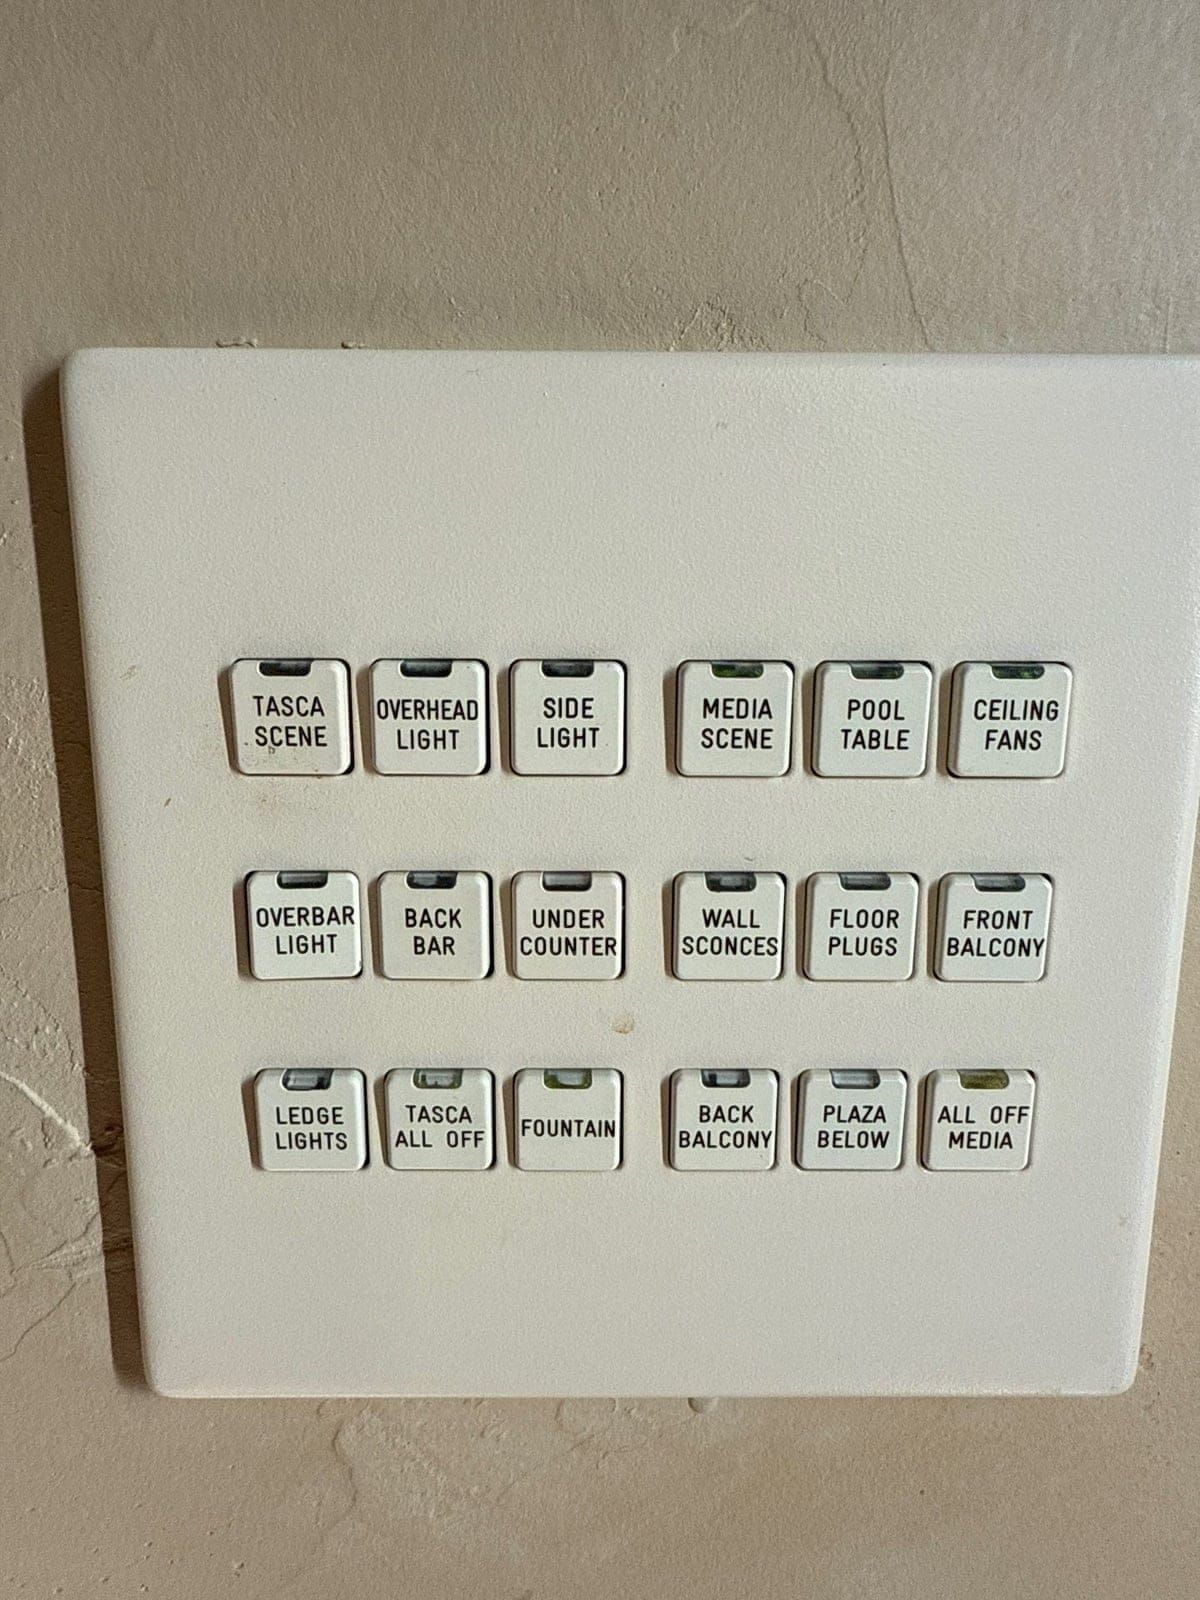
This is the hardest category, because it doesn’t isolate cleanly with a single test. If several unrelated zones are dropping out and recovering on no obvious pattern, the DIP switch test on any one module will likely show the module working fine — because the fault isn’t sitting still long enough for a snapshot test to catch it.
The two most likely culprits, in order of how often we see them:
- Untwisted, unshielded keypad wiring picking up interference. As noted above, 3-conductor keypad runs without shielding are common on original installs, and they’re more prone to noise-induced comms errors as a house accumulates more wiring, more devices, and more electrical noise sources over the decades than existed when the system was installed.
- A CCU nearing the lockup behavior described in Symptom 1, but not yet failing completely — producing partial or momentary faults rather than a clean solid “8.”
Neither of these resolves with a DIP switch test, a fuse swap, or a reset button. Tracing intermittent wiring faults or evaluating a CCU for partial failure is diagnostic work that requires opening enclosures, testing connections under load, and understanding the original wiring topology — squarely in “call a professional” territory.
What This Diagnostic Path Can’t Fix
Every test above tells you where a fault lives. None of them manufacture a new CPU card, a new keypad model, or a new dimmer module. That’s the honest limit of troubleshooting a system that’s been out of production since 2015: isolating the fault is often the easy part, and sourcing the part is the part that may not be possible at all.
If your diagnostic path lands on a CCU that won’t hold a reset, a module that fails the fuse swap, or a keypad model that simply isn’t available on the secondary market anymore, that’s not a troubleshooting failure — it’s the system telling you it’s reached the end of what field repair can do. At that point, the honest options are a secondary-market part of unknown remaining life, or planning a full LiteTouch replacement on your own timeline rather than during an emergency.
The service terminal. If the display is dark or frozen on a stale timestamp, the CCU has stopped executing — not a load or keypad problem.
A Note on Safety
Everything in this guide up through observing status lights, pressing a CCU reset button, and reading the result of a DIP switch toggle involves no exposure to line-voltage wiring. Beyond that — opening module enclosures, swapping fuses, tracing wiring, working inside a keypad — you’re working around 120V circuits that share space with low-voltage control wiring in the same enclosures. That combination is exactly the kind of thing a licensed electrician or an experienced automation technician is trained to work around safely, and it’s exactly the kind of thing that goes wrong quietly when it isn’t.
Grizzly Tec holds Texas security license #B-29733501. We are not an electrical contractor, and any line-voltage work beyond diagnostics is coordinated with a licensed electrician as part of a project. If your isolation testing points to a module, fuse, or wiring fault, that’s the point to bring in someone qualified rather than continuing on your own.
When Diagnosis Turns Into a Replacement Decision
A LiteTouch system that’s throwing its first fault in a decade is worth diagnosing and repairing if the part can be found. A system throwing its second or third fault in a year, or one where the fault traces back to the CCU itself, is telling you something different — that the remaining useful life of the platform is measured in occasional working days between failures, not years of stable operation.
We’ve walked more than a few Houston-area homeowners through exactly this decision point. If you’ve run through this diagnostic path and landed somewhere that doesn’t have a clean fix, our LiteTouch replacement guide covers what a LOXONE migration looks like, what wiring gets reused, and what it costs. We’ve been a LOXONE Partner since 2015 (Platinum today), serving Spring, The Woodlands, and the greater Houston area.
My LiteTouch CCU Died — What Are My Options?
When a LiteTouch CCU dies, Grizzly Tec’s plan is to replace the CCU with a LOXONE Miniserver, starting with a remote diagnosis. New CCUs haven’t been manufactured since Savant discontinued the platform, so a dead CCU isn’t a part you can simply order and swap.
Before scheduling anything, work through the CPU card reset and the DIP switch test described above — they tell you whether the fault is isolated to the CCU or sits somewhere else in the system. If the CCU won’t hold a reset or keeps throwing the same fault, that’s the signal to move from diagnosis to planning a replacement.
Should I Repair or Replace My LiteTouch System?
Grizzly Tec recommends replacing when the CCU itself fails, when several modules fail, or when the parts a repair needs are no longer available — not for every fault that shows up on the diagnostic path above. A keypad with a few dead buttons usually points to a keypad-level problem, not a failure of the CCU or a module, and that’s often still worth repairing on its own.
Because LiteTouch parts are no longer manufactured and any secondhand part carries no warranty, the pattern that matters is repetition: a system throwing its first fault in years is worth repairing if the part can be found, but repeated faults — especially ones that trace back to the CCU — are the signal to plan a replacement instead of chasing the next part.
Still Troubleshooting, or Ready to Talk Replacement?
Book the $450 Diagnostic — bring us what you’ve found with this diagnostic path, and we’ll tell you honestly whether it’s fixable or whether it’s time to move on. You can also run the numbers yourself first with our LiteTouch replacement cost calculator.
Ready to discuss your smart home project?
Book a free consultation — we'll discuss your goals and outline options.
Book a Free ConsultationShare this article

Founder & Mechatronics Engineer
Daniel Lopez founded Grizzly Tec in 2012 and has designed and installed 1,000+ projects (audio, video, networking, security and automation), including 50+ LOXONE projects. A mechatronics engineer by training, he holds a Texas security license (B-29733501) and has been a LOXONE Partner since 2015 and a Platinum Partner today.